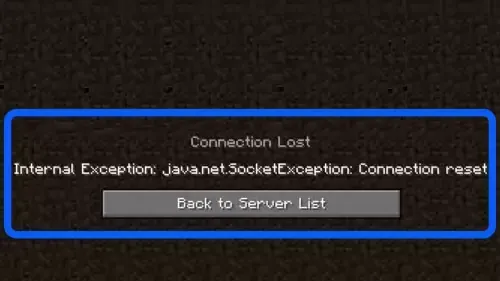
Today, I will tell you some methods to fix An existing connection that was forcibly closed by the remote host on Minecraft on PC.

Method 1: Stay up to date First, go to Microsoft Store. Navigate to Library then click Get Updates. If an update is available, apply the update and check if the internal exception issue is resolved. Next, press the Windows key then type Configure Java and select Configure Java from the results. Now steer to the Update tab then click on the Update Now button. If an update is available, apply the Java update and check if the internal exception issue is resolved. Next, go to Settings then navigate to System. Click Windows update. Click check for updates. If an update is available, apply the update and check if the internal exception issue is resolved. Finally, restart your pc and check if you still get the same error.
Method 2: Turn off Windows Firewall and 3rd party antivirus software You may encounter the internal exception issue if the Firewall or 3rd party antivirus software of your system is blocking access to a resource essential for the operation of Minecraft. So to fix it, you should turn off Windows Firewall and 3rd party antivirus software.
Method 3: Clear the DNS Cache Press windows to the key then type cmd. Right-click on Command Prompt and pick Run as administrator. Now, type ipconfig /flushdns and press Enter. type ipconfig /registerdns and press Enter. type ipconfig /release and press Enter. type ipconfig /renew and press Enter. type netsh winsock reset and press Enter. Finally, restart your pc and check if the Java exception issue is resolved.
Method 4: Disable Server’s Resource Pack Open the Minecraft launcher and select Multiplayer. Then select the problematic server and click on Edit. Now click on Server Resource Packs to set it to Disabled (if enabled) and click on Done. Then check if the launcher is clear of the Java.io issue.
Method 5: Reset your last session on the Hypixel server Open Minecraft then Click Multiplayer. At the bottom, click Direct Connect. In the Server Address, type the Server Address you want to connect to. Then click Join Server. This should reset your last session on Hypixel. See if that works. If not, then you should restart your router. To do that, go to where your router is located. Then unplug the router's power cable. Next, wait for 1 to 3 minutes. Now, plug the power cable back in and start up your router. Once the router has finished booting, launch Minecraft and check if the Java exception issue is resolved.
Method 7: Uninstall the Conflicting Applications The Minecraft community has come up with a list of all the programs that are incompatible with Minecraft. So before jumping straight to the next methods, consider closing any conflicting program by checking your currently installed programs against a curated list of software that is known to conflict with Minecraft.
Method 8: Decrease the Render Distance in the Minecraft Settings Open the Minecraft Launcher then open its Options. Now select Video Settings and slide the Render Distance to the lowest possible (e.g., to 2). Then check if the Java.io issue is resolved. If so, then you may increase the Render Distance by one till you reach your desired Render Distance.
Method 9: Enable Native Sandbox Press the Windows key then type Configure Java then open it. Now steer to the Advanced tab then checkmark Enable the Operating System’s Restricted Environment (Native Sandbox). Then apply your changes & reboot your PC. Upon reboot, check if the Minecraft IOexception issue is resolved.
Method 10: Perform a Clean Boot A "clean boot" starts Windows with a minimal set of drivers and startup programs so that you can determine whether a background program is interfering with your game or program. This is similar to starting Windows in Safe Mode but provides you more control over which services and programs run at startup to help you isolate the cause of a problem. For more details and how to do please visit the Microsoft help page.
Finally, if none of the methods work for you. The best thing you can do at this point is to ensure that you back up your saves before reinstalling Minecraft.


0 Comentarios